Friday, November 6, 2015

Setting up the game

Blogging live from Fall In


Some shots of the game as we set up.


Monday, November 2, 2015

Building Rivoli Battlefield part 5

We are almost done! We got 2 good days of work in over the weekend and made significant progress. Much to my wife's dismay. When we last left off we were flocking fields. That takes time as we have to wait hours for the paint to dry. Also we don't want to do too many fields at one time as we recover the flock that does not stick. We try not to mix the colors of the recovered flock.

But all that is behinds us as the pictures below will show!


Now that the fields are done, we put in hedgerows between the fields and along the roads. We use Woodland scenic products, Clump Foliage, Lichens etc. But they don't always have the colors we want. So we started making our own flock. The hardest part was using the oven and cookie pans when my wife wasn't looking.


Gluing down hedgerows


We drop a bead of white glue and just go clump by clump. It's a long process.


Every road, every field. Tedious, but we really like the effect.


Here's the table mostly done. We have to do some touch up, add flock/clump foliage to the rough areas and pour the river.


Rivoli is the center of this shot.


This is looking north up the river valley, with Rivoli on the left.


So close to finishing, we can't wait.


Next up is the river pour, that is tonight!

Xin

Thursday, October 29, 2015

Building Rivoli Battlefield part 4

On Tuesday Lou came over to help and Wednesday I had off so Alan came out for the whole day and we got a ton of work done. We still are up against a pretty tight deadline, but I feel much better about it now.


Out comes the flock for the fields. Is there a thing as too much terrain?


The road next work with excess ballast cleaned off.


Laying out villages and planing the fields.


This is a long process. We paint on a ground color and drop the flock on it while the paint is still wet. We have a small roller we use to push the flock down into the paint. Then it takes about 3-4 hours to dry.


We shake off the excess flock onto newspaper and use that to dump it back into the bottles. Very little wastage.


We try to plan out the fields and do all one color at a time. What way when dumping the excess, we don't mix the colors.


So this is about 3 sessions worth of work.


The last session we just kept putting fields down, as we needed to make up some time. Some of the flock will mix when we dump, but we had to. This is where we stand right now, a week out from the convention.


Tonight I'll finish the fields and start patching where the flock is not fully glued to the board. Friday Alan is coming back and we will do hedgerows between the fields. We also have to add foliage to the rough areas like the mountain spur on the side of the table. And finally we need at least 2 days to pour the rivers. Eazy Peazy....


Xin

Monday, October 26, 2015

Building Rivoli Battlefield part 3

We made some good progress over the weekend, but it' starting to sink in how little time we have left. I think there will be paint drying in the car ride out to Lancaster....


With the hill down I use a light weight spackle to cover up seams and smooth out slopes.


The light weight spackle drys slow, so waiting overnight is a must.


Some quick sanding and the slopes are looking good.


We throw a base coat of paint down.


Now comes the road network. We use paint and railroad ballast. We paint out the road, dump the ballast on top and mash it down with a roller.


Just waiting for it to dry and we will shake off the excess. We recover all the excess to use again.


All the roads are down


Tonight we hope to get a start on the fields and villages....Stay tuned.


Xin

Friday, October 23, 2015

Building Rivoli Battlefield part 2

We got some more work in last night. Now we have to wait while glue dries.


Make a mess with foam, some blood was spilled, those razor blades are sharp. Blood and sweat, check, no tears yet.


Hills taking shape, with cutting and sanding. I use a 5 inch random orbital sander. Makes a crap ton of dust but makes smooth slopes. Always use a mask when sanding foam.


Carving a cliff face. It looks crappy in the rough but comes out good in the end.


Liquid Nails to glue hills down, left to sit over night.

I need to sneak the bricks back into the garden before the wife sees.


Running low on bricks, Added bottles of liquor as they were close by.


Carved cliffs, Alternating angled cuts, shallow and deep, then just spend 5 minutes hacking at it with razor blade. Literally hacking.


Cheers, Xin

Tuesday, October 20, 2015

Building Rivoli Battlefield part 1

Fall In is fast approaching and we are frantically building our battle table for the Battle of Rivoli. It seems like we have been here before, lots to do and not a lot of time to do it. We really need to get in a cycle of building a convention ahead.

Like our other major builds we are documenting along the way. So check back and follow our progress into madness.


Look at all that terrain goodness. You have to dig through a lot of boards to find sheets that are not warped. When the boards are sent to Home Depot they are banded together in big stacks. Those bands warp the boards.


Eight foot boards don't fit in the wife's minivan, so it requires a little parking lot foam surgery. We bring a tape measure, steel ruler and razor knife with us in the car. We hack off 2 feet of board on each one.


We arrange the boards for best fit. Getting a tight seam is important. The boards are labeled in order and line up marks are drawn on the boards. This will be a 6x8 table so we have four 2x6 boards.


After consulting as many maps as we can, we map out all the major terrain features for the battle. Rivers, hills, villages, roads, etc. We use glass beads to transfer those features to the foam boards.


We like the glass beads because it's easy to shift around terrain features as we lay out the table.


Once we have everything laid out, we use a Sharpie pen to draw in the lines and scoop up the beads.


To carve out the rivers we use a Dremel. I have a router attachment that allows to control the depth. Really makes it easy this way. We do this outside and wear dust masks since the Dremel makes a lot of toxic dust.


Once the rivers are carved we sand out the rough bottom and edges.


Here's the Adige River that will cross 2 boards.

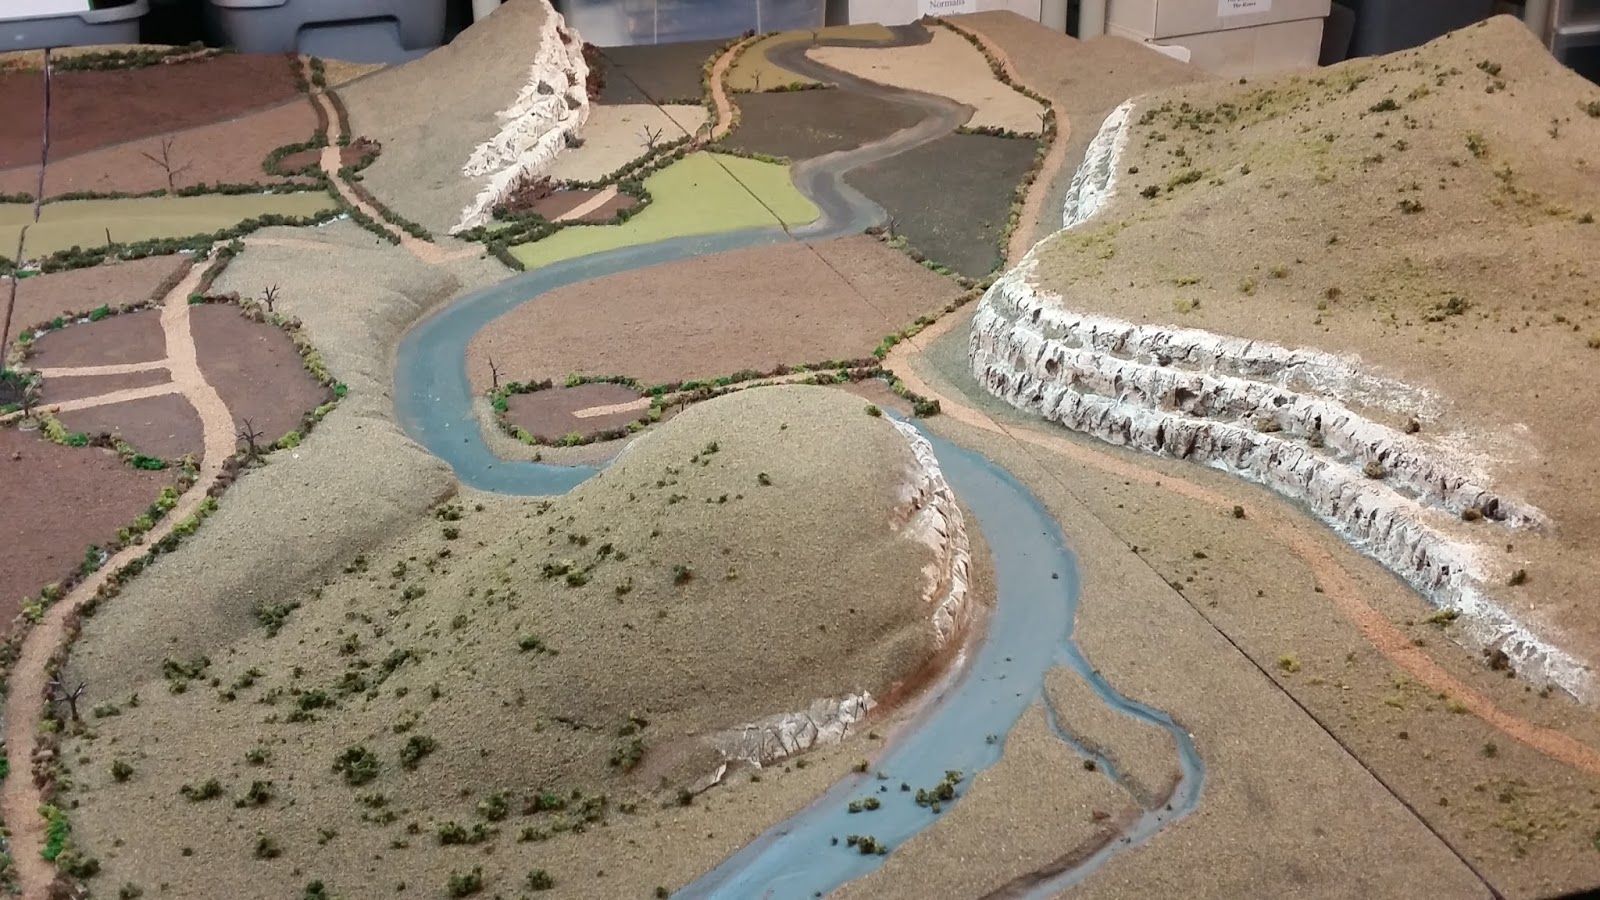
Next we have to place hills. Rivoli has some very dramatic terrain. Two valleys with steep cliffs and the river running through them.


We will "step" the foam boards to build up the mountain ridge that comes down on the side of the map.You can also see I painted the river. We will be pouring the river so it's important to seal the foam as it can react with the river material. I painted multiple coats.


More hill cutting.


That's a lot of foam!


Next up carving the slopes on the hills and cliff faces.